Check out my Pages

Monday, December 4, 2023

Year End Review Regarding Art Festivals/ Studio

 Lessons learned, crisis averted, and being practical...........what a year it has been!

For any artist looking to participate in art festivals I hope some of my experiences help you with your interest in art festivals.


First and foremost, be prepared for the amount of work (physical and mental) that goes into participating in an art festival.  Usually it takes me two hours to set up and display my tent, about an hour to disassemble.  Even though I am very careful with rewrapping my artwork for the return trip home.....everything else is thrown into our vehicle to get us home.  The next day is when I return everything too it's rightful place, ex: rolling up tent walls, sheers, organizing display bin, etc.  I always make sure that the day before a festival I take off from work to prepare for any last minutes issues, there always seems to be something. Ha. Also, I take the day off from work after the festival to focus on inventory and reorganizing my bins.  Typically you set up your tent one day and then return the next for the festival.  On the last day of the festival you pack up and leave. Lastly, I think of my art tent as a pop up business, I want it to be eye catching, yet professional. 


Streamline:  Really think about what you should bring to display your artwork.  Do you really need two tables or can you make a beautiful display with one?  At the end of the festival you are usually very tired and the thought of having to lug that extra table you didn't need back home can be exhausting. Most artists set up their tent and display ahead of time.....I think this is a great idea. However, one I never followed. I tend to learn on the fly.....for better or worse.


Is the festival really worth the time, effort and money?  This is a hard one, because I feel like if you don't try, then how will you know?   Since I am still in my gaining experience phase, I tried many different types of festivals this year. Some were great, others not so much. I did receive good advice from a fellow artist, she says she only participates in two shows a year because she works full time, and it has to be a two day event, not a one day event.  I tend to agree with her, because I work full time too, and a two day event typically produces more sales.  Although, I do love The Shadows in New Iberia and will probably attend in the fall of 2024.....even though it is a one day event.


Give yourself time.....With any business, it takes time to grow.  Sometimes I compare myself to other artists, who have been participating in festivals  for years and have built up a clientele, and wish I could be like that.  We all have to start somewhere so it is ok if you don't have 1000 followers on Instagram and Facebook friends.  Eventually you will get there if you stick with it and are consistent.


Crisis Averted: I displayed a painting on the top of my checkout stand and I wanted to move my stand a few inches up to be out of the sun.  So I started to slide the stand forward and accidentally raised the top and everything fell off.  There went my painting flying into a ditch behind me. Fortunately the painting wasn't damaged and there was no rain water in the ditch......but I realized I need to be careful how I display my artwork. Accidents happen, so I display artwork to minimize damage.


Being practical:  Did I really need to build a grapevine chandelier for my tent?  I didn't even bring it to the last show..........I was too tired. Now the thing is taking up space in my studio. Eventually I will disassemble it but not until I have free time.  Oh did I mention I work full time? LOL    Art Festivals require a lot of moving parts.  Where will you store your artwork, tent, tables.....etc when not in use?  Our entire house has some aspect of Christin's studio stuff, along with her tuff shed converted to studio.   Needless to say, it is a commitment in time, storage and money.  Hopefully I didn't scare anyone!


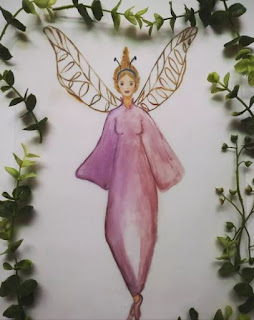
Ultimately, I love participating in art festivals.  I love meeting people and explaining my art process.  You never know who you are going to connect with. You have to be the type of person who can roll with the punches too.  I had a woman tell me my fairies (in the paintings) weren't real fairies because they were too large compared with the landscape.  I smiled and said, I have to think about that.  However, in the back of my mind I was like, you don't get what I am doing. Ha. Seriously, you can't take anything personal.  People are entitled to their opinions and they do not mind sharing:)


I did want to share upcoming ideas for 2024:  Check it out:  I purchased metallic watercolors and Sennelier watercolors. 


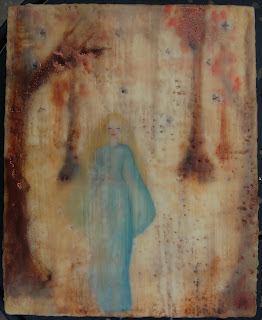
Here is a (part of an) oil painting I started working on last year but I will be turning into an encaustic painting, titled< "In Her Garden". 


So that is that.

I hope everyone has a wonderful holiday and the best New Year.

Keep creating


Christin 


Thursday, November 2, 2023

One more show to go


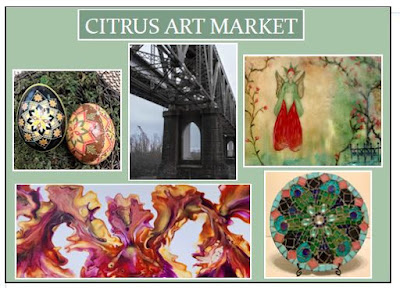
Citrus Art Market will round out my shows for this year.  I am looking forward to this market because it is held at my friend’s house. This is an easy market, and the artist’s are really good people.

Although with any Art Sale there is still much preparation that goes into any of these events. I have postcards to distribute, signs to fix and we are running an ad in The Gambit.  I am very curious as to how this will drive sales?

Check it out:


After several shows, I think I am finally content with my tent setup.  This is my tent set up for now:


I really have worked on streamlining my tent to cut out time in putting the artwork up and taking it down. Although there are a couple of things that I could take out (like the lighted vines hanging inside my tent) but I love them….. so they will stay, along with the extra few minutes it takes to hang them.


I did create a lighted vine chandelier for my tent for an event that was held during the evening and night; however, the event (for me) was a bust & fiasco and I didn’t even have time to hang it. So for Citrus Art Market I will be hanging the fixture, I would like to use it at least once since I put so much effort into making it………but the chandelier is something that I will not be taking for any other art festivals. (Again streamline).


Oh I did want to mention that my checkout stand worked beautifully for sales. The stand keeps me organized and makes my sales transaction smooth and quick.  Love it.  I highly suggest investing in making a stand or purchasing one to keep you organized. 


After this Art Market I will be ready to get in the studio and paint. I miss moving paint around and being in my studio.  I have several ideas swarming my mind and want to get them down on paper.  Also, I ordered new watercolors.  The watercolor set I am currently using is not as brilliant as it should be..........so I splurged on a Sennelier set. Thankfully they were on sale. In order for me to continue to move forward with my art.......my skills, supplies and paintings need to be better.  


Keep creating,

Christin


Sunday, October 1, 2023

Ahhh the start of fall

 Fall is in the air........well maybe not here, but the days are getting shorter and it is slightly cooler..........and I am happy just for that. So I am preparing for three fall shows and I still have much to do.  I tell everyone work (job) gets in the way of my fun. LOL


I finished my foldable check out stand.  Yes, I custom built the stand, scallop and all.  Check it out: 


Costs:  fencing wood was recycled but I did spend hours sanding the boards down and cutting out the rotten parts. Since this was an old fence....underneath the worn surface was  beautiful solid wood. Although if you do have to purchase fencing I believe the boards are around $3 each. I did purchase one 1" x 2" x 8' wood stick for the shelf brackets. Cost $3. Also, I purchased a better piece of wood (1/2" plywood) for the top and shelves which cost about $13 . I believe the piece was 24" x 36".  The scallop wood trim was left over pieces from my flip bin. The hinges were repurposed from my screen doors I use for art displays.  The white stain I had on hand; however, I did purchase satin polyurethane which cost around $17.  I sanded down the wood in between the 2 to 3 coats of poly...........yeah I definitely didn't want any splinters while handling the stand.  


I am happy with the design and by keeping the stand narrow, it is not too heavy to lift in and out of the truck.....which means I can do it myself. The size is 39" tall by 24" wide and the sides are around 12"The amount I spent was reasonable, (do able for my art budget)compared to the portable stands for display booths that can cost up to $800.  


I know to measure twice cut once; however, I did make a mistake that cost me time fixing.  I made the sides too wide so that when I folded the checkout stand it wouldn't lay flat.  What a bummer, because I glued & screwed the fencing together.  So I had to use a circular saw to cut down a 1/2" from the sides. Of course it came out a little rough so I had to sand down the rough edges.....but hey I shouldn't have to rebuild another one anytime soon:)


I did purchase a couple of yards of cotton duck fabric.  I plan to sew up a carrying case for it.  Since the top and shelves are removeable.........I really want a case to keep everything together.  I still have time to sew one up, but if I can't get to it for the first show....I am ok with it, and will get it done for the next show.


Check out the map for Twin Steeples:


My tent # is 45.   I am so excited ....smiling big right now!


My best,

Christin


Friday, September 1, 2023

It's Showtime

 It’s showtime:


Thankfully there is a break in the weather, about a 7 degree temperature drop and we have had rain. (Big Smile).  I was trying to finish my last encaustic with a heat index of 107….My poor encaustic medium took forever to cool on the wood panel. I tried using a piece of watercolor paper to fan it. No bueno, I say.  Over the weekend, I finished the last encaustic painting for the up-coming shows ………..and it was most troublesome.  At one point I wanted to cry out in frustration, maybe it was due to the dripping sweat?... regardless a swoosh of wind blew glitter not where I wanted it on the painting and at that point I had to laugh.  With a sigh, I say, the painting is complete, and now it is time to move on to the non creative side of art shows. 


Here are my new business cards and professionally printed up glossy postcards. Check it out:


Business cards and glossy postcards for shows


Also, I am in the process of  making a foldable check out stand.  I repurposed a piece of our old neighbor's fence that was taken down by our new neighbor.  (That was an event that took too much time away from painting and left me struggling to catch up.)  Also, I am using wood scraps from our garage; although I will have to purchase a nice piece of smooth wood for the top.  The goal is for me to be more efficient with wrapping artwork.  I think by having shelves this will organize my boxes and bags.  I am looking forward to seeing how the checkout stand will work during shows. Fingers crossed. I will share my checkout stand when it is finished.


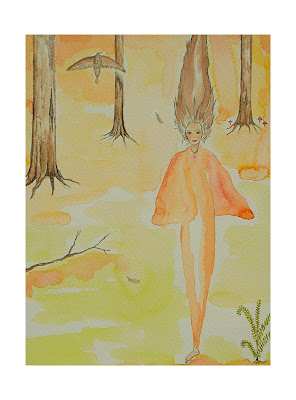
Lastly, I created this haunting painting. This is a larger painting: 16" x 20" wood panel.   Originally I designed the swamp background for a swamp mermaid. After painting the background with encaustic, the swamp mermaid I painted on vellum didn’t feel right.  So I pivoted.  I really wanted something ghost-like to complement the background.  The idea of protection came to mind.  The whooping cranes in Louisiana are a protected species and what a beautiful tale could be told about a ghost that appears only during a pink moon and she speaks to the whooping cranes to find out about their well being.  Of course the whooping cranes can talk under the pink moon. 


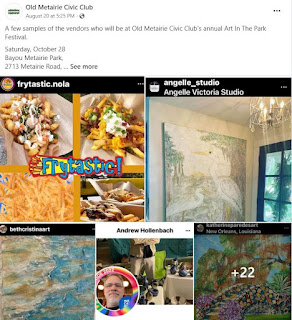
In October, I will have a tent at the Twin Steeples Art Market in Ponchatoula. October 7th & 8th. Also, I will be at the Metairie Road “Art in the Park” October 28th.  Check out their Facebook page


Art in the Park, Metairie Rd


Keep creating,


Christin


Tuesday, August 1, 2023

Oh Mother Nature

 Even though I love working in my studio, the temperature has been brutally hot.  So to keep me on track for finishing up my encaustic paintings I moved my tools to the garage.  I noticed a nest in the garage but really did not think anything of it.  Well a bird laid three eggs in the nest and now they are babies.  I have been staying out of momma's way, so no garage and no encaustics. 

Regardless I continue to work on the oil backgrounds for the encaustics and all the elements. As soon as the babies leave the nest...........I will be back in business and will have lots of encaustic medium to melt. 

Since I have no encaustics to share I thought I would do the next best thing and share the elements and background for a painting titled, "Swamp Desire".  Check it out: 


This painting was inspired by the red orange dragonflies that have been hanging out in our yard.  I don't particularly remember ever seeing them before till this year....but who knows?

They have such an interesting color........it is not quite red yet not quite orange, but striking regardless.  They will pair beautifully with the cute little swamp mermaid.  I am so looking forward to completing this painting. I will be adding some celery green mica powder to the painting as well. 

Oh, let me share some fabulous news.  I was accepted to participate in the Twin Steeples Village Art Market  Check it out: 


The festival is located in Ponchatoula, LA famous for the Strawberry Festival.  I am so excited.............I can't wait. If anyone attends please tell me Hi!


I am not embarrassed to share I did not get into the New Orleans Art Market. There were so many reasons why they rejected me that all I could do was laugh.  Although I did take one criticism and immediately remedied the situation.  Basically I forgot to show on my art studio website that I sell original artwork not just my archival prints.  Oh well....it was like no time like the present to fix it. 


Lastly, I really needed to order new business cards for these upcoming shows.  I used Got Print online and they should be here in about a week.  I will share on the next blog.

Keep creating, 

Christin


Saturday, July 1, 2023

Feather Whimsy

 Feathers seem to find me............I am not sure why, but I love the special messages feathers offer.  Did you know that if you find a white feather that is your guardian angel telling you they are there right by your side?  What a special and unique way to communicate.  

Typically, I see feathers when I am walking the dogs or doing some other outdoor activity.  They catch my eye and of course I have to pick them up. I have quite a collection.  Here is a collection in a raku vase.  Of course I have them in special "treasure" boxes too. 

Feathers in a raku vase 


My artwork reflects feathers that I find.  Here is a watercolor I completed earlier this year called:  "Feather Whimsy".  

"Feather Whimsy"
"Feather Whimsy" Original Watercolor & Archival Prints available.


Also, I create drawings of feathers on vellum and then incorporate the vellum into encaustics. Check this out: 

Feather Treasure, Encaustic on Prepared Paper


Anyway, I had to take a small break from creating encaustics.  When the temperature outside goes down (yes I said down) to 93 degrees then I can get my heat gun out.  Currently, the temperatures have been around 98........wow.  

Happy Creating

Christin 


Saturday, June 3, 2023

Creating a body of artwork for Art Festivals

 Currently I am working on encaustic paintings; which not only take me more time to create then my watercolors, but they also need time to cure (harden) before I sell them.  Since I create the encaustic process outdoors, I was hoping to have them finished before New Orleans' summer heat would swoop in, but it didn't happen:(   Let the sweat roll. Ha!

Check out my encaustic station outside, which includes a large griddle and heat gun: 

Encaustic Station Outside


Despite the occasional burn or hot encaustic falling onto my feet, I am enjoying the process.  Like other mediums to create artwork, you should have a map in your mind or sketch of how you want it to look or feel.  I do love the "happy accidents" that occur in creating artwork, and I have made a lot of happy accidents with my encaustics. (But that is how you learn. ) Yes at one point my entire encaustic station was encrusted with glitter............well at least it was pretty and I am sure the fairies enjoyed the sparkle.


Here is my latest encaustic painting titled, " Dangerous Mushroom III" 


Here is my process to create "Dangerous Mushroom III" encaustic painting: 

First up: I painted my figure and "elements" on oil on vellum.  (I use the word elements to describe the small bits of paintings on vellum such as the red mushrooms and fern.) I let the vellum dry for about a week. Meanwhile, I applied three coats of primer to my wood panel.  Then I applied a foundation layer of oil paint; which I let dry for about a week. Next, I brushed a layer of encaustic medium over the oil foundation, and then using a heat gun, I heated the encaustic to smooth out certain areas. Let cool. 

Figure placement: Once I decided where to place my figure I briefly heated up the encaustic area and laid the vellum down.  With a spoon, I gently rubbed the figure into the encaustic. Then, I brushed on another layer of encaustic medium.  I used the heat gun again to fuse the layers together being careful not to over heat the vellum because it curls up.  I continued with the same process until all the elements were in place. 

 Final step, glitter.  I heated up areas using the heat gun where I wanted glitter on the painting. Gently I scattered glitter on the surface.  The encaustic and glitter was reheated again using the heat gun and allowed to cool. 

Personally, I think of the heat gun as the same as a paint brush.  The heat gun can be used to manipulate the encaustic medium and the oil paint.  


So that is pretty much is my encaustic process for now.  I am sure that it will change and evolve which happens over time. 

I am looking forward to displaying my new encaustics in the fall.

Best wishes,

Christin


Tuesday, May 2, 2023

Encaustics, watercolors, art festivals and children's book...oh my

 Encaustics:  

I love this medium.  Basically, the encaustic medium is beeswax and resin; which is heated  and applied to a wood panel.  You can layer drawings, and photos or even create an oil painting and apply encaustic over the painting. Recently I have been experimenting with glitter and mica.  Currently, I have been painting my figures on vellum in oil and then layer them into the encaustic medium. Although I don't have any new completed encaustic paintings to show you all, I do have an image of an oil painting on vellum. The title is " The Bee Fairy": 


The Bee Fairy


(Oh, I should mention I only sell encaustics in person.  They are not on my Etsy Shop.) Here is an encaustic I finished earlier this year.  Titled, " Fall Flight Path": 

Fall Flight Path


Watercolors: Currently on the back burner. Once I finish up with encaustic paintings I will return to watercolors. I do have several drawings waiting for paint. 


Art Festivals: I did apply to New Orleans Art Market; however, an email was sent to me that they are hiring a new market manager and asked for my patience. So who knows when this will happen? Otherwise, I am committed to "Art in the Park" in October on Metairie Rd. & "Citrus Art Market" 


Children's Storybook: So a few years ago I wrote and illustrated a children's book; however, after laying out the design of the book............I realized I didn't correctly illustrate the book.............big bummer. I didn't have the correct number of pages, and I put the main character on a page where it would have been cut off in the center. (bummer)  So I began again.  Although, a lightbulb did go off in my mind.  I don't have to have my illustrations for the book............so I started submitting the book to publishers this year.  In the meantime and for fun, I created a power point video with the beginning illustrations.  I figured as I create new pages to the book I will add to the video until all the pages are complete.  Check it out: 


I am very grateful to everyone who has purchased, and admires my artwork. I love to paint and it is touching when someone connects to your artwork. 

Keep creating..........persistence pays off.

My best,

Christin 


Tuesday, April 4, 2023

Magical Adult Fairy Party

 My sister turned 50 in December.  She asked me if anyone was throwing her a party........and when I heard no one was, I stepped in and said I would throw a Fairy Party for her. (Something we talked about years ago)  As we all know the holidays are not the best time to throw a Birthday party............so it was pushed back to March.  However with my art show we pushed it back again and finally a date of April 2nd came to be.  

I planned to cook and serve a brunch type food with a champagne punch.  There would be crafting time and of course dessert. So let me share some photos, insights and a budget of $200 (which I did go over and eventually turned into $300) for nine people which included my sister and myself.


Invites were easy.  I created a cute publisher image and that was sent via text.  (cost /time)


Thank you gifts:  Cute fairy lanterns in gift bags.  Total cost ($30)  The dollar tree is a great place to pick up the mason jars, flowers, battery operated lights and glitter cricut sticker paper on a roll.  I have free access to a Cricut, so I made the fairy silhouettes for the lanterns and fairy stickers for bags. I purchased gift bags from Hobby Lobby when they were on sale.  I went to Michaels for the moss. I watched several "how to videos" for making fairy jars and it looked simple enough.  Well, maybe it is not that simple.  We forgot to water down the glue and we ended up with opaque gold glitter jars.  I then had to use a toothbrush and water and scrap the glitter off so you could see the fairies.  A hot mess. So this took days to do in between work.  Time spent: about a week in between working....but I do believe they came out gorgeous.


Wands for everyone:  I saw a beautiful wands for $36 (a piece) on the internet. This was not in the budget, but Sculpey was.  I purchased $30 worlth of sculpey...I figured I could make beautiful wands too. I already had wooden dowels and paint.  I really wanted something special to attach to the wands so I spent $10 on a jar of real rose quartz. Of course I viewed several "how to" videos on using sculpey and it really is easy to use.  Actually I love it. So time spent.......approx. 12 hours including (sealing the wands after they cooled) (FYI: I did bake the rose quartz to the sculpey...it was fine in the oven)Total spent $45  In addition, we needed the wands to make fairy potions. 


We had two different Crafts:   At 5 and Below they sold a Potion set for up to 6 people.  So I purchased that and then went to the Dollar Tree and purchased additional vials, bottles for mineral spirits and more glitter.  I did create a little booklet with magic spells that I handed out. Two of the potions you needed your wands to wave over the potion.  The second craft were wooden birdhouses that can be painted and decorated.  Cost $35. Really no time preparing except for making sure everything was accessible to guests.   My thoughts on two crafts..........two are too much.  We only focused on the fairy potions and there was not enough time to decorate birdhouses.  So save your money and only offer one craft........really that is all you need. Now I have birdhouses sitting in my studio. LOL


Wings and floral crowns:  Seriously I started making the crowns with real vines, but when I saw how much flowers cost and I would still have to weave them into the vine........I stopped what I was doing and ordered floral crowns from Amazon.  I received 10 for $20.  It was worth it to purchase and not make.  Wings......I purchased a few wings from the Dollar Tree for anyone who needed a set.  Total cost $35 


Decor:  Hanging Floral.  I had wooden dowels on hand and saved some paper flowers my Mom no longer wanted.  I used dry vines from our yard to wrap around the dowels and then weaved the paper flowers in.  I did purchase plastic beads that look like swarovski crystals in blush and clear and slid them on floral wire to create a glass bead garland.  This took approx. 8 hours to make. Cost $20


Hanging Paper Mache mushrooms:  I love paper clay.  I created mushrooms out of aluminum foil and then covered them in paper clay.  They took about 3 days to dry and then I painted them with acrylic paint.  Once they dried I sealed them with acrylic spray.  Cost $15.  Time:  These took about 16 hours total.


Fairy domes: Cost $10. I made these the same time as the lanterns.  I used the same materials.  The domes were from the Dollar Tree.  Super easy to make once I learned how to apply the glitter.


Food signs:  found branches, wood slices, moss and flowers.  Cost $7.  I only had to purchase the wood slices. I enjoyed searching for the perfect branches for the signs.  I made 7 of these.


Hanging photo backdrop:  From Amazon. Cost $20 ( I plan to use this for a possible art show in the future.)  The backdrop was a hit.  Everyone was taking selfies and loved it.  

Tablecloths: 2Fairy vinyl tablecloths from Oriental Trading.  $10 (I wanted something that could be tossed ) 

We did use fine china and silverware.  It costs less but you do have dishes to clean up...I am fine with dishes to wash. 

Flying fairy wishes:  We all loved the flying fairy wishes.  We tried to light them in the tent but it was too windy............so inside in the kitchen it worked.  We were all clapping and laughing when the wishes flew.  Absolutely purchase these.  Cost $15


My garage has a few saved pieces of wood from previous projects..........which was perfect for fairy doors and a sign post.  

My sister made us outdoor mushrooms out of plastic bowls, felt and paper towel tubes.  The cardboard tubes were spray painted white and she used E6000 to attach the bowls.  White felt was glittered and attached to the bowls.  Cost ($7) 

Ooh, the tent, side panels, tables and sheers are from my art studio. 


With any outdoor event, you have to be flexible.  Originally the weather was forecasted to be on the cooler side: however, the day of it was blazing hot. I planned to have the food outside with a beautiful table set..... but with the temperature being so dam hot.... I left the food, plates and glasses inside and served buffet style.  We had to carry our plates and drinks outside.  I did make sure to have the air conditioner running inside the house so guests could go in if they were too hot outside. 

I had some oops moments.....but I rolled with it. And despite the warm air it was a beautiful day and everything was naturally gorgeous. 

Enough play time (maybe not?) it is time for me to get back into my messy studio, clean it up and start painting.  Instagram viewers probably think I gave up on my art career....never LOL.

Happy Spring (or Summer if you are in New Orleans)

Christin


Thursday, March 9, 2023

Thank you to everyone for making the Shadows Art & Craft Festival so much fun

 We had a great time in New Iberia.  The Shadows Plantation is a wonderful place to showcase your artwork, especially if this is your first out of town show. The commute for us was about 2 1/2 hours......so not bad.  I was able to fit everything in the back seat of our truck and the bed of the truck. Somehow we managed to fit our bikes too. 

This is a laid back type of show; which was perfect for being tired. We had to do a lot of unloading and loading.  I see why a lot of artists have little trailers so they can lock their stuff up.  Eventually I do need to get some type of camper top that locks for the truck or mini trailer. (Future endeavor). So Glenn did most of the lifting and hauling because of my shoulder injury.  I did suggest to him we should purchase a collapsible wagon before the show but he felt confident we didn't need it.  After the show he mentioned we really need one. LOL .Seriously I appreciate all his help..........I couldn't have done it without him:)

I did try out my new tent wall idea; which is using heavy mesh tent to hang artwork vertically. I didn't do a test before the show........for in my mind I knew I would make it work.  Surprisingly it did.....no issues. Also, I purchased lighted vines for the inside of my tent.  I love the effect, and ordered more so my entire tent will be covered. Also, I made custom table runners with my logo.....I love them. 

Things I still need to make smoother.  The checkout station.  For some reason this continues to be my downfall, specifically wrapping encaustics and bagging them.  I recognize that this is an issue and needs to be streamlined.  So by next show I will pull it together. 

Lastly, thanks to everyone who signed up for the raffle & receive my newsletter.  A winner was emailed and their print is on the way.

Check out my tent: 

Magical Series 

Encaustics

Encaustics

Front of tent 

Magical Series 


Swamp Series 

  Keep creating.


Christin 


Wednesday, February 1, 2023

Preparing for an outdoor Art Festival.............it is more than the artwork

 The countdown is on.  I have about a month to finish as much artwork as I can, and all the non-artwork "things to do" before the March 4th outdoor art festival.  Even though my list is long I will try to get as much done as I can.............and whatever can't get done,  I will be ok with it.  I still want to have some fun. 

The outdoor Art Festival is at The Shadows on the Teche. Check it out:

The Shadows on the Teche


November's outdoor art show had some challenges due to the weather, and well just experiencing new things in general.  One of my goals in January was to sew up an art carrier in outdoor fabric.  Before sewing this lovely carrier I had to lug a large box with my framed original paintings; which was heavy and wet cardboard..........no bueno.  What I did was measure the box and sew up a carrier with handles that the box slips into.  I love it.  I used outdoor fabric from Hobby Lobby and heavy duty craft interfacing.  (Note:  you cannot iron interfacing to the outdoor fabric.........it pretty much disintegrates. Yep I did that) Basically I made a sleeve for each side of the box, slipped the interfacing in and sewed it up.  I left a finished 1/2 border around each piece and sewed the carrier along the seam.  My machine cannot sew through two interfacings.  Things I  should have done was sew the handles on before making the box.  Oh well. It  was a pain but I did it.  No more worrying about  a wet box and original framed paintings being destroyed:) Check it out:


Signs:  Yep I  started with a hand painted sign, but after looking at Art Festival requirements, many will not let you hang hand painted signs.  Signs are expensive and I really need to spend my budget wisely.  Fortunately, I have free access to a Cricut.  I created my design in publisher, saved as a jpg and uploaded it to Cricut.  I didn't know this until I did some research...........You can use Cricut iron on / on wood.  Yep.  So I  ironed my design to two different wood panels.  I spray painted one in apple green and the other sign I left in the white barn wood.  I like them both, and will probably use both in my tent.  Check it out: 


It is time to get back into the studio and keep creating. I am looking forward to sharing images and experiences after the Show.

My best,

Christin