Check out my Pages

Showing posts with label SEWING. Show all posts

Wednesday, August 17, 2022

Vacation = Studio Time

August is a good time for me to take a vacation, since this is the time that least effects my job.  I have been  looking forward to taking time off so I can work in the studio and prepare for November's art sale. 

Here is a recap: in April, my artist friends and I had an outdoor art sale in my front yard.  One of my artist friend's has a house on a busier street......... so for November's sale we will be in her yard.  We are all very excited about the change of venue.  

Even though during April's sale I did some things right, I still had some failure moments.  Like when my art prints took flight from the "clothesline" display idea I had.  Oh well.  Anyway fast forward, I really want to have a display wall to hang my original watercolors.  Of course I am on a budget and even though the metal grid walls are very functional I really don't want to spend that kind of money. So, that is when I purchased vintage wood screen doors.  Finally, I built the feet and tested out the functionality of my idea...........and with great relief it works.  Check it out: 


Freestanding Door for Art Display


Here is what I purchased to make these:

6 pieces of 2" x 3" lumber ($4 each)

4 metal inexpensive shelf brackets ($2 each) 

4 decorative metal shelf brackets ( $7 each)

8 metal stakes to push into grass ( $2 each)

Of course I had screws, glue and miter box for cutting. 


Here are the details:

40" length of feet with holes in the front and back to push metal stakes through


Predrill holes


30" tall vertical to hold door in place.  (One in front and one in back which makes like a sandwich. ) Vertical wood pieces were predrilled, glued and then screwed in place with 3" screws. 

Decorative shelf bracket secures the front of the wood and inexpensive white metal secures the back.

Metal shelf brackets to secure wood


 My tent size is 10' x 10'.  The doors are approx. 3' wide so with two of them that will fill one side wall  with room to spare.

I hope this blog helps someone with the freestanding door idea.  It works!

Keep creating.

My best..............Christin

Sunday, September 6, 2020

Simplicity 8947...easy peasy

 So I have been lap swimming outdoors for a year now, and I really wanted to sew up a pool dress for fall.  (A cute simple dress that will get me through the gym to my vehicle)   I found Simplicity 8947 and new it was the right pattern for my pool dress . This is a super easy pattern to sew.  Here is the low down:

Pattern has a lot of ease. I sewed the Medium size with no adjustments.  The fabric I choose is a terry knit that I picked up from Hobby Lobby. For the dress, I sewed up image D, but I did use the arm pattern of image A.  I do like the way the dress came out.  I can totally see sewing this dress in a nice sweatshirt fabric and possibly adding some embellishments to the sleeve. However, the sleeves do need to be shortened a tad for my next dress.


Pool dress for Fall


My sister took this photo using her cool phone's photo app


Oh, I wanted to mention this dress could be sewn in a day.....I sewed it in a weekend because of other projects. 

Lastly, I re-filmed Paper Cut Out Collage.  The new video is less quirky and has more content.  Check it out:

https://vimeo.com/453420067

Tuesday, August 18, 2020

Studio curtains please

 The studio is coming along nicely.  Currently I have been sewing curtains for my windows.  I really wanted to sew up something non-fussy...............So this is what I came up with.  

Quilted cotton with a floral pattern.  Check it out:


Next up:  To sew a chair cushion in a quilted cotton with a different pattern.  I plan to make my own piping.  


Lastly, here is a link to my most recent How to video titled:  "Paper Cut Out Collage".  Enjoy


https://drive.google.com/file/d/1xPD3SB5kQykpYTgrv7u8WpqFlpN4q6tI/view

Monday, October 7, 2019

Fun furry paws and ears

         Halloween is quickly approaching and my thoughts are on a small play that I will be performing on Halloween evening.  Really, it is more like taking story time and making it come alive with costumes, props, and a little bit of singing.  (It should be all of 30 minutes.)

         The story is  Grimm's  "Little Red Riding Hood."  So my co-worker will be the wolf and since we are on a budget, and I can sew.........I said I would make the wolf ears and paws.  Easy enough I thought.  Ha!  Considering I never have sewed with fur before!

        Love the internet..........there are lots of wonderful tutorials on making fur paws and ears.  I found a very helpful website called Matrices.net

       She has a free paw pdf pattern.......easy enough to download.  Also, she has step by step clear instructions.  (Awesome)  So, the paws were really easy to make, but the fake fur is harder to sew with.  Make sure you use a heavy duty needle.  I sewed the paws on the sewing machine along with the paw felt pads.  No need to zigzag the felt....I just used a regular top-stitch. Also I used thin black foam to cut out paw claws, just remember to sew them with the  pointed edge facing paw pads before you sew paws right side together. To finish off the edge of the paw gloves I used a scrap of black bias tape.  Check it out: 
Wolf Paws


       For the ears, I looked on the internet for a ear pattern.  Please note:  I printed out a pattern that looked like a good size.  I wish I would have held it up to my headband.  They came out a bit large, but I think for a goofy wolf it works.  In the future I think I may make the ears smaller.   The ears were a little more work.  After sewing right sides together, and turning out,  I hot glued black foam on the inside so ears will stand up straight.  I hot glued the pink felt  and another piece of fur on top to cover the bottom felt edge.  Then the ears were hot glued to the headband. Check it out: 
Wolf Ears


      Materials:  I purchased a yard of fake fur which is enough for paws and ears.  I think I have enough to make a tail if I feel up to it.  1 piece of black felt for the paw pads and 1 sheet of pink felt for ears. A scrap of black bias tape to finish the edge of the paws. 1 sheet of thin black foam for paw claws.  Also, a headband for ears and hot glue.   Time:  Around 4 hours for the paws and 3 hours for the ears.  (Could be quicker but I took my time....since I really didn't know what I was doing. )

Check it out: 
Wolf, coming out of the bushes

Check out the wolf claws 


 I hope this was helpful. Happy Halloween to all! 


Wednesday, March 6, 2019

Farewell Pillow

     My co-worker decided to retire, so on her last day we threw her a farewell party.  Of course I wanted to make her something special and a decorative pillow felt like the perfect gift.  So that is exactly what I did.

Pillow size:  12" x 16"

Followed "Cottage Magpie's"  directions...........which I refer too every time I make a decorative pillow.  Angela has photos and makes it super easy to quickly sew up a pillow.

Fabric:  Linen with a little spandex.  (I wanted 100 % percent linen in a cream color but this was all I could find at Joann Fabric store.....so  Half a yard please!)

Embroidery:  I went online, and found a design I liked.  Traced it on to tissue paper and started hand stitching.  I kept the design and colors simple. 

For the border:  Well I really didn't want this pillow to be fussy and trim could have made it over the top.  I had enough fabric left over to create a border; which I cut 2 inches wide and folded over.  So the border is actually about an 1 from the edge of the finished size.  I used a ladder stitch via my machine to sew it in place and keep the underside seam from unraveling. 

Check it out: 

Simple decorative pillow with lots of details.
Time:  About 3 hours of hand stitching and 4 hours of sewing pillow together. 

My coworker loved it and said it was going on her bed.

*************
      So Mardi Gras was yesterday, was my costume finished on time........Nah.  The weather turned unexpectedly cold (we are talking the high temps in the 50s ) and there was no way I was going to be dressed as an adult Tinker Bell.    Fortunately the Irish Italian parade is coming up so I am thinking Tinker Bell in all her glorious green will make an appearance........unless it turns cold again.  Then I will be forced to wear jeans, jacket and gloves.   We will have to wait and see!


Thursday, February 21, 2019

Hello Kitty Pillow ...........gift for a co-worker

A co-worker's birthday was coming up and I really wanted to make her something special.  I know she adores Hello Kitty so I decided to make a decorative pillow for her.  

For a pattern, I went on the internet and looked up a "printable coloring sheet" and found a cute simple line drawing; which I printed out.  

I used felt for Hello Kitty's face. ( I love that you don't have to finish the edges of felt) and for the fabric I went straight to my stash.  The polka dot fabric is a classic quilting cotton, and for the back fabric I had some black cotton sateen...........so soft!   

The only materials I needed to purchase was the ric rac and pillow form. This project took about 4 hours to make. (Yeah, Cause you know time is in short supply these days)  It helped that my fabric was already washed! Check it out:

Simple Hello Kitty Pillow


By the way, she loved it!

Next up, another decorative pillow with hand stitching.  I do have another co-worker who is retiring............so I think an elegant simple pillow is just the present for her. Of course the chocolate chip cake with chocolate buttercream frosting I am planning on baking will be a nice addition too;)

Somehow I will make time to finish my Mardi Gras costume.  Yes, I am sewing up a fairy/ Tinkerbell inspired costume.   Currently I am drafting the blouse pattern, and the skirt is finished.  Still have a cape to sew too! Fingers crossed it will be finished on time. Although blogging about it is a different story.  -I have sewn so much this past year but you wouldn't know it by this blog....bummer-

Moving on: My last post spoke about my children's story book.  I couldn't get the words right for the group of drawings that are on this blog....... so I wrote another rhyming story first and now I am working on the drawings/paintings.   This is a long process that I am hoping to have finished by the end of the year. 

Happily creating .............I hope you are too!

Tuesday, March 6, 2018

"M" is for Magic

     "M" truly is for Magic.  It has been a while since last blogging.  I recently changed my occupation and so far it has been satisfying.   I actually enjoy going to work............to me that is magic. 

      So, what is all this magic about?!  About a month ago, I volunteered for our weekly Story time, since my co-worker had a conference. (background) I have never worked with children in my life, and have never done a story time, so I asked my co-worker what I should do..........Her reply was, "It is your story time, you do what you want."     Well, it didn't take long for the wheels to spin in my mind and a production is what I wanted.  

      The letter I chose was "M" for magic.  I found three incredible easy to read magic books (My favorite is The Magic Hat), and of course I would be a magician.   Every magician needs a cape so I decided to sew one up along with a magic hat. Besides, living in New Orleans believe it or not a woman needs a cape in a her closet!

      For the cape I chose Simplicity 1294 Pattern A.  Fabric:  Crepe back satin from JoAnn Fabric.


       I made a few adjustments to the pattern.  Instead of using gross grain ribbon for the front ties,  I cut  a 2 inch strip of my fabric, folded with right sides together and made my own ties. I used my handy dandy tube turner for this and all went well.  I did use a beautiful 2 1/2" trim for the collar (not venetian lace) and I omitted the feathers along the front.   I was able to sew the cape together in one day.  What took the most time was the 5/8" hem all around......which really wasn't that bad.

       For the hat I chose Simplicity 8361 View B. 


       Now, I did have to make some changes to the pattern  for my magic trick: which I pulled a bunny out of the hat.  Basically, I followed the sewing directions and once completed,  I added a second lining with a small opening. The bunny laid in-between the original lining and the second one.  When I showed the children the inside of the hat, with no bunny, I made sure the opening was covered by my hand, and then when it came time to pull the bunny out,  the inside of the hat faced me.  All they saw was no bunny and then a bunny. The children were over joyed and one said........."she really knows magic".  It was hilarious and fun.  Of course they helped me by saying the magic word, Abracadabra.

       Check out the photo collage: 


        Oh, I did want to share this little wool needle felted Minnie Mouse I made for my co-worker.  I forget how I found out about wool felting but as soon as I saw little animals wool felted on the internet, I decided I must do this.   Anyway, Minnie Mouse is only about 2 1/2" inches tall.  I found the teacup from a flea market, and  sewed her little skirt and bow. Also, I used pipe cleaners for the body so her arms and legs are moveable.   Enjoy! 


Monday, July 31, 2017

Another Butterick 5951 in Gertie's challis fabric

       About a year ago, my Mom, my sister and I had to run up to Baton Rouge for an errand.  On the way back home, I mentioned that I really needed to stop in the "large" JoAnn fabric store so I could look at Gertie's fabric. (Yeah, our local store doesn't carry Gertie's fabric, bummer).  My Mom and sister know that I have a fabric addiction, and that I would pester them until we went to JoAnn's  .....so we did.  I ended up purchasing this beautiful Gertie"s rayon fabric for Butterick 5951  Currently both the bodice & skirt are ready to be sewn together.  Yeah, I took the extra time to line the skirt with black bemberg.  I mean if you are going to line the bodice why not do the skirt too!


       Here is my work in progress: 


bodice in Gertie's rayon fabric

      Please note: this fabric does run. So, make that muslin test first, because when you seam rip the fabric awfully runs.


      Oh, here is  little decorative pillow I did for a former co-worker.  Yes, I even did embroidery on the front on cotton, with trim, and home decor fabric from Hancock's on the back.  Now I just have to get it to her. Check it out:
front of embroidered pillow with the word "Autumn"


       Here is the back of pillow:
backside of pillow


    So, I still have a little time before work............I think I will continue sewing  my dress.  

Sunday, January 8, 2017

CC made treasures


         Now that the holidays over it is time to take a breather and start focusing on this years sewing goals.  Mostly, I plan on sewing more warm weather dresses and coordinating outfits......lets face it in New Orleans you may wear your beautiful sweater only three times a year.   (Although, right now the temperature is currently 29 degrees!...so today is one of those beautiful sweater days.)  

        In addition, I have containers upon containers of beautiful lightweight fabrics that I plan to sew first before buying new fabric.  Already, I have a cute black and white gingham cotton fabric cut, marked and ready for sewing.  I love having a pattern that has been already adjusted to fit me. 


      Moreover, before I start my next sewing project, I decided to do something dangerous....I unscrewed the top part of my machine and cleaned around the tension wheel and the parts in between.  I have never cleaned the top part of my machine, thinking that it needed to be professionally cleaned and after sewing with it for 3 years now I knew it needed to be done.  Yikes! It was filthy, and my fear of taking the top off is now alleviated........I know I can clean it without destroying it! 


     Now onto the little holiday treasures I sewed: 


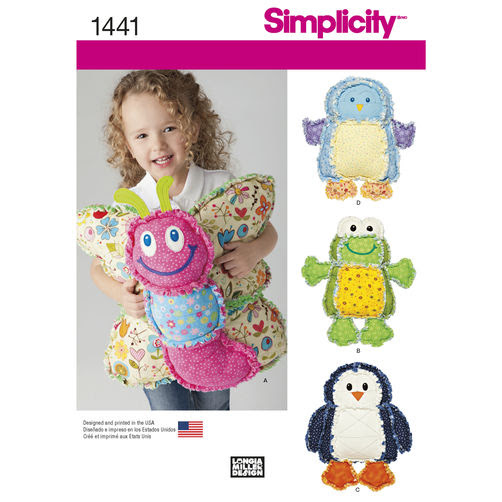
    First up:   Simplicity 1441 . I made the butterfly rag pillow.   


Review:  This pattern is very easy. The sewing time was only about 3 hours. What took the longest was cutting all the pattern pieces.  Each pattern piece needs 3 to 4 layers of fabric. I used cotton flannel so I could only cut a double layer of fabric at a time.  If using flannel, I wouldn't suggest cutting all the fabric in a day, cause you might pull a muscle or bruise your hand.  Electric scissors would have come in handy for this project.  Overall I think the pillow came out cute. 
front of pillow


back of pillow

   Next up :  functional drink coasters, using Sweetly Stitched Handmades  book, by Amy Sinibaldi

front of coasters


back of coasters


 Review: First things first.  I love this book.  The photos are beautiful, and the author gives you wonderful tips at the beginning of the book.  In addition, the templates are in the back of the book. I will sew more of these lovely projects.

Sewing easy. Although, sewing the ric rac even on the coaster takes patience. In addition, the author suggested using interfacing in between the fabric; however, I used flannel.  I read somewhere that flannel sandwiched in between the outer cotton fabric will absorb moisture better.........so that is what I did. In addition, I added top stitching to the coasters.  

   Next up: pillow with hand embroidery.

You can check out the link to the last pillow I made. 


pillow


detail of embroidery 

      Last but not least, a little bib.  Again, Sweetly Stitched Handmades, came in handy. 


bib

      Looking forward to sewing cute outfits, and blogging about them! 

Wednesday, October 12, 2016

Simplicity pattern 2305 / Cynthia Rowley design

        It has been so long since I last blogged that google thought I was an imposter...seriously. Anyway, I managed to get logged in and am so ready to write about my latest sewing project......Simplicity pattern 2305  view b.

       Cynthia Rowley is my all time favorite designer.  She has such a youthful, easy aesthetic that resonates with me.  Here is goes:


      Fabric: black linen for fashion fabric and  lightweight batiste for the underlining for skirt part of dress. 

      Design elements: scoop neck, kimono type sleeves, gathered waistline, side zipper, top stitching on sleeve band and skirt band. 


      Alterations: just widened the waistline a bit and used a 9" regular zipper because it was what I had readily available. 


      Struggles/None: this pattern went together easily and directions were simple to follow. 
detail of zipper and skirt part of dress


     Changes I would make in the future. Nothing on view B; however, I did make a muslin for view A, and will have to make some changes. Will have to make a  full bust adjustment and shorten the band on the sleeve.  I did make my muslin test in a cotton; however, I can see both dresses in a beautiful silk crepe de chine. 

     Investing in lots of linen and cotton is one way to survive New Orleans heat.  I love this linen dress because it keeps me cool, its comfortable, looks great with high heels or a pair of comfortable sandals.  Ultimately it is easy to wear.....which works for me!

     Hopefully, I will have a new blog sooner then later. 

      Le Bon Temps Roule!


Sunday, November 30, 2014

McCalls 6902......Easy but do let me count the errors of my way


    Yes, I have been dreaming of sewing up a fall suit..........specifically a lined jacket, but nothing too fussy with a matching pencil skirt.  I already have a simple skirt pattern altered to fit, so I just needed a jacket pattern.  I was drawn to M6902 as soon as I spotted it because of its simple design and that pretty printed "easy" word.  In my mind I thought I could whip out this jacket in 2 days............ah such dreamer! 

        Easy Pattern M6902:


    First lets start with the fabric: Black and blue checked heavy linen purchased at Hancock fabrics for about $4 a yard.  I purchased 4 yards, enough for a skirt and jacket. Please note:  Even though the pattern calls for a fabric with good drape, I choose this heavy black and blue checker linen; which is a little stiff.  Something about this fabric caught my eye and I decided to go for it.  Maybe it wasn't the best choice. I think a beautiful wool suiting would have been a better choice. Live and learn.

   Lining: black bemberg from JoAnn's.  Yeah, I purchased it with a coupon so I paid something like $4 a yard.  Again, I purchased 4 yards. 

    Piping: purchased 2 packs of Wrights pre-made black piping.  The pattern suggested ribbon which is top-stitched to the pattern; however, I thought piping was a little more high end looking.

   Notions:  In my stash I had the black rose button. Even though the jacket calls for hook and eyes..........I wanted something more glamorous.  Although, I still put in a hook and eye on the inside, for extra holding power. (Should I say suck in power)


Check out my outfit: 
Jacket and matching pencil skirt


   Lets get to the heart of the matter, fitting issues, design changes and the lining.  

   Fitting:  I did make a bodice test muslin for the jacket.  (Actually 3 muslins all total)  My first mistake was not adding the sleeves to any of the muslins.  If I would have added the sleeves, I would have realized I needed a little bit more room in the back area. Second mistake: I should have added a hook and eye at the waist to the muslin so the front of the jacket would close like on the model.   Instead I kept pulling the jacket to get a good bust fit; however, each time I did that I had to increase the FBA.  I ended up increasing the FBA almost 2 inches, but later after the jacket was finished I had to take apart the lining from the jacket and decrease bust area an 1", because it was way to big. Third Mistake:  After adjusting the torso (length and shorten three times) my pattern became skewed and if you notice the closure at the waist is not straight.  Fourth Mistake: Lining the jacket. I should have used the bag method; which I found after the fact.  Instead I followed the instructions and tried to sew the sleeve lining to the sleeve jacket seam; however, I admit I am not good at it. Fifth Mistake: Design change in sleeve cap, I added a pleat.  In my mind I thought it would be a beautiful detail; however, I think it would have looked better if I used a softer drapey fabric.  Sixth Mistake:  Under-stitching the lining to the outer fabric.   Did I miss a step or miss read the instructions?  But how can you underline the jacket if you sewed the lining and jacket together all the way around?  Anyway, I ended up top stitching the jacket to lining once I turned it right side out. Final mistake:  I wish I would have added more fabric to the front center so the V shape wasn't so wide at the top.


                 More images: 


Jumping to stay warm

Cool mural on the side of a bar.

Another mural

Backside showing peplum


      Suggestions:  Keep in mind the jacket closes at the waist.  I highly suggest doing a full test muslin first before cutting into that expensive fabric.  Also, I would like to try this jacket again, but with a new pattern (since my adjusted pattern is a mess) and a drapey fabric.

     P.S. I owe a big thank you to my photographer, who not only got up early on a Sunday morning but also took photos in 35 degree weather.  Awesome! 


Monday, October 13, 2014

White Clipped Silk Cotton Voile in McCalls 6650

  Silk Cotton Voile is a dream to cut and sew............and is at the top of my list for most favorite fabrics.  It presses beautifully and feels great next to the skin.   In addition, I feel for clothing it is very "office" friendly.  

    Recently, I completed (another) McCalls 6650 using a white clipped and light blue teal silk cotton voile.  Then using Butterick 4989, I  sewed up a matching blue batiste camisole to wear underneath, and to complete the look I sewed up a winter white worsted wool pencil skirt underlined with Bemberg lining.   Check out my latest fall or spring look: 
Pretty blouse and comfy skirt


 Blouse fabric:  silk cotton voile, purchased earlier this year at Mary Jo's in Gastonia, NC.  Purchased 2 yards at $24 per yard or something like that. 
 Camisole fabric: batiste, purchased a yard around $3.00 on sale at Mary Jo's.  
Pencil skirt fabric:  St. John's worsted wool, purchased one yard at $34. Purchased from House of Fabrics in Asheville.  2 yards of a cream Bemberg lining purchased at Jo Ann fabrics for about $4.50 a yard.  I used a 50% off coupon, otherwise it would be like $8.99 a yard. Fortunately I didn't have to order via internet, and my local Jo Ann fabrics keeps black and cream in stock!

Changes I made to sew up blouse:  I used a clear snap in the back of the blouse instead of a hook and eye.  In addition, I hand sewed in silk organza for an interfacing. Sewed using French Seams, and used bias tape on the hem to make a neat finish.
bias tape for hem...makes a neat finish on the inside 


Time frame:  It took me a couple of days to sew, but could have been sewed in a day once the pattern was adjusted. 

Camisole:  no changes made to the pattern. It only took a couple of hours to sew up. (yah)
matching camisole using pattern Butterick 4989


Winter White skirt:  I have a "go to" pencil skirt pattern.  I did make the skirt an 1" longer then my standard.  Also, for a closure,  I sewed two loops into the waist facing which goes around two beautiful buttons, above the zipper. Also, I underlined the wool with Bemberg lining.  Hong Kong seams, and for hem I sewed bias tape around rough edges then turned up and used a catch stitch. 
This skirt took about three days to sew up.......of course I made sure to hang up my skirt before hemming. 


button loop closures instead of hook and eye

Catch Stitch for hem, Hong Kong Seams


I like rainy days

Next up: a heavy navy and black checked linen suit lined with black Bemberg lining............but you know I will go back to McCalls 6650 but sew up a different view.  I love this blouse pattern!